Saturday mornings smell like flour, warm sugar, and quiet anticipation. The heavy griddle hums at a steady 375 degrees Fahrenheit, waiting patiently for the first ladles of pale yellow cream. You watch the bubbles form on the surface, flip the disc with a practiced flick of the wrist, and expect absolute perfection. The ritual is comforting, a familiar rhythm of pouring and flipping that signals the start of a slow day.
Yet, the result often feels a little too soft, slightly damp in the middle, lacking that distinct textural snap that makes diner breakfasts so satisfying. You blame the heavy pan, maybe the inconsistent heat of your stove, or perhaps you just assume home cooking can never replicate that industrial cast-iron magic. The disappointment is subtle but persistent, a small gap between the meal you imagined and the one sitting on your plate.
The standard approach taught in generations of home kitchens is to grease the skillet heavily, hoping the exterior fries before the interior dries out completely. We rub cold sticks over hot metal or pour pools of vegetable oil, creating a smoking, splattering mess. But this usually leaves a greasy residue on your fingertips and a heavy feeling in your stomach, masking the delicate flavor of the vanilla and wheat.
The professional reality is entirely different, relying on an internal mechanical shift rather than external lubrication. The secret to that golden crunch on every single bite doesn’t happen on the griddle at all. It happens three minutes earlier, with a quiet, violent sizzle right inside your glass mixing bowl.
The Architecture of a Crisp Edge
Think of pancake batter not as a sponge waiting to soak up ambient heat, but as a fragile, temporary emulsion. When you pour raw, cold batter onto a hot, buttered surface, the dairy solids in the pan burn long before the flour inside the batter has a chance to properly toast. The heat fights through a layer of grease, steaming the dough instead of searing it.
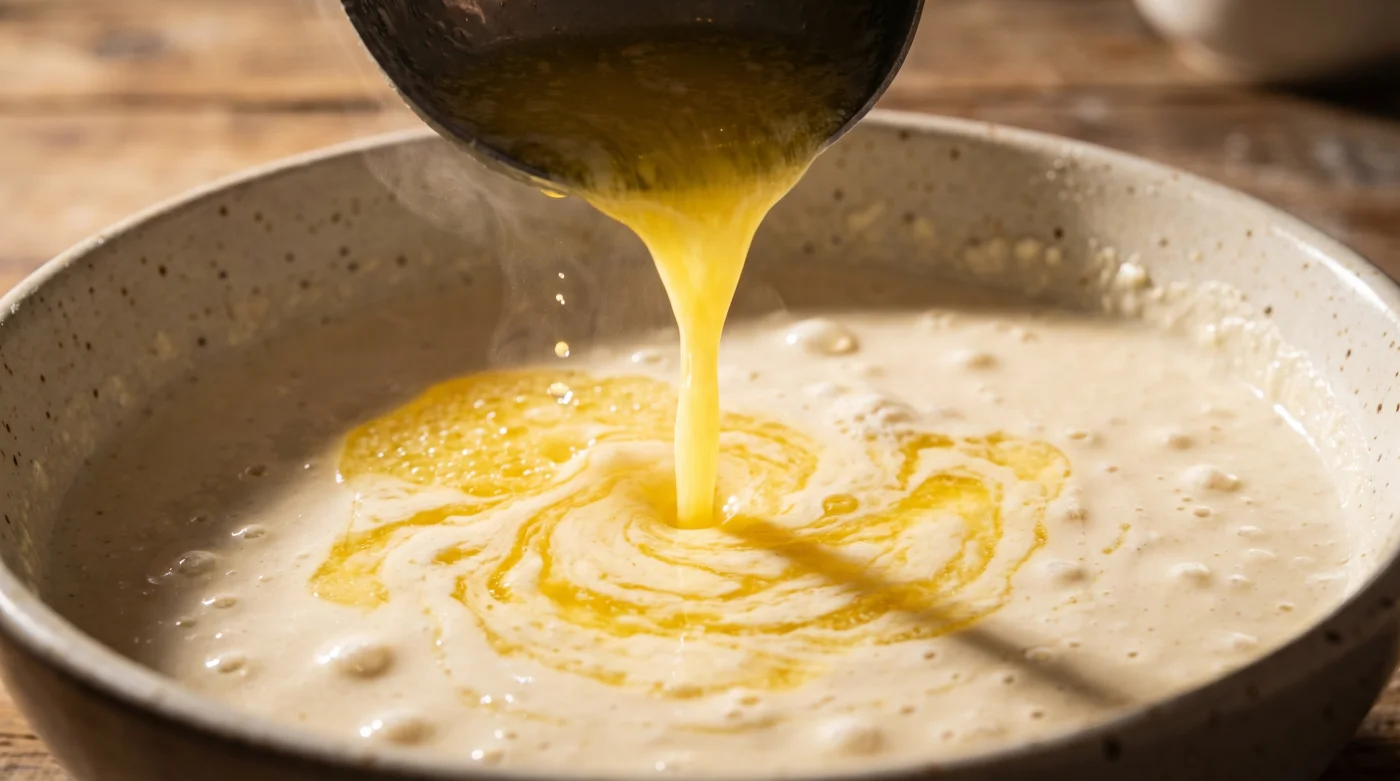
The perspective shift here is brilliantly simple: you must move the fat from the surface of the pan directly into the architecture of the batter. Mixing hot butter straight into the cold, resting liquid creates microscopic pockets of fat that fry the dough from the inside out. As soon as the batter hits a dry, hot skillet, those internal fat pockets erupt, crisping the edges instantly.
Suddenly, the mundane act of melting butter isn’t just about adding richness or flavor; it becomes an act of structural engineering. Instead of fighting a greased pan to get a crisp edge, the batter actively crisps itself. You eliminate the smoke, the mess, and the guesswork, replacing them with a reliable chemical reaction.
Sarah Jenkins, a forty-two-year-old prep cook in a fiercely busy Chicago breakfast joint, treats her morning station like a masonry workshop. She learned early on that the morning rush doesn’t allow time to constantly wipe and re-grease flat-tops between three hundred orders. Her method is unapologetic: she pours browned, bubbling butter directly into the resting vats of batter, whisking furiously so it forms tiny, suspended pearls of fat. “The batter should look like a pale mosaic,” she often tells new line cooks, noting that this single, deliberate pivot guarantees every edge crisps up instantly on contact, leaving the center soft, steaming, and remarkably light.
Adjustment Layers for Every Kitchen
Not every morning demands the exact same level of intensity or precision. You can adapt this internal-frying technique based on what sits in your pantry and how much time you have before the household wakes up and the coffee gets cold. The mechanics remain the same; only the inputs change.
For the Weekend Purist, you want the classic, nostalgic diner experience. Use salted European butter, melting it in a small saucepan until the milk solids just begin to toast and smell like warm hazelnuts. Whisk this aggressively into a buttermilk base. The high acidity reacts aggressively with the hot fat, ensuring a lacy, almost brittle edge that snaps audibly when you cut it with the side of your fork.
For the Busy Parent, time is entirely scarce, and patience is thinner than the batter itself. You need the result without the ceremony. Microwave two tablespoons of standard unsalted butter for forty seconds until it pops behind the glass. Pour it directly into your favorite boxed mix right before ladling. The result is a significant textural upgrade that requires absolutely zero extra dishes or mental load.
For the Dairy-Free Baker, managing fat requires a slightly different awareness. Coconut oil or clarified ghee acts as a brilliant, highly effective substitute. The absolute key is ensuring the oil is genuinely hot—around 140 degrees Fahrenheit—so it creates that immediate sizzle when it hits the wet ingredients, locking in the structure before the starch hydrates too much and turns gummy.
Executing the Internal Fry
Implementing this technique requires a bit of rhythmic timing and spatial awareness. You are no longer just stirring ingredients together in a bowl; you are actively tempering fat. The process is gentle but requires your full attention for about sixty seconds.
Start with your dry ingredients fully incorporated with your cold milk and eggs. Do not overmix; leave the small lumps alone. The batter must sit completely undisturbed for at least ten minutes, allowing the flour to relax and absorb the moisture evenly. This resting period is entirely non-negotiable if you want a tender center to contrast the fried exterior.
When you are ready to cook, bring your butter to a gentle crackle on the stove. You want it hot enough to whisper when agitated, but not so aggressive that it smokes or instantly scrambles the raw eggs sitting in your bowl.
Here is your toolkit for perfect execution, a minimalist approach to maximum texture:
- Heat your skillet to a dry, steady 350 degrees Fahrenheit. Wipe away any residual oil with a paper towel.
- Melt three tablespoons of butter until the foaming subsides completely, signaling the water has evaporated.
- Pour the hot liquid gold into the resting batter in a thin, continuous stream while whisking gently with your non-dominant hand.
- Ladle the batter immediately onto the dry skillet. Watch for the edges to set, bubble, and turn opaque before committing to the flip.
Beyond the Breakfast Table
Getting a perfect crust on a simple morning meal might seem like a highly specific, almost trivial victory. Yet, these tiny moments of physical mastery accumulate over time, fundamentally shifting how you interact with your living space and your raw ingredients. Food stops being a chore and becomes a medium for intention.
When you understand the actual mechanics behind the food you prepare, the kitchen stops being a place of rigid rules and becomes a quiet workshop of intuition. You stop merely hoping for a good result and start actively engineering it. The anxiety of burning the first batch fades away, replaced by the calm certainty of a process that works every single time.
A meal that snaps, crunches, and yields exactly the way you intended carries a specific kind of quiet satisfaction. It grounds your morning in competence and care, proving that with a slight shift in perspective, the most ordinary rituals can become entirely remarkable.
The difference between a good cook and a great one is knowing exactly when to break the rules to build a better physical structure.
| Key Point | Detail | Added Value for the Reader |
|---|---|---|
| Temperature Control | Heat butter until foaming stops (approx 180F). | Ensures the fat is hot enough to fry the dough internally without scrambling eggs. |
| Resting the Batter | Allow the wet and dry mix to sit for 10 minutes before adding fat. | Hydrates the starches so the batter holds its shape on the griddle. |
| Dry Skillet Cooking | Cook on a completely ungreased 350F surface. | Eliminates greasy residue and allows the internal butter to form a clean crust. |
Frequently Asked Questions
Will pouring hot butter cook the raw eggs in my bowl? Not if you whisk continuously and pour in a thin stream. The cold milk and flour create a buffer that tempers the heat instantly.
Can I use oil instead of butter for this method? Yes. Coconut oil or clarified butter works beautifully, though you will miss the specific toasted flavor of browned milk solids.
Why does my pan need to be completely dry? Adding external oil creates a barrier that prevents the batter from gripping the heat directly. Your internal fat is already doing the work.
How long should the batter rest before cooking? Ten minutes is the sweet spot. It allows the gluten to relax, ensuring the center stays tender while the edges fry.
Does this technique work with boxed mixes? Absolutely. The chemical reaction between hot fat and cold batter remains exactly the same, instantly upgrading a commercial mix.