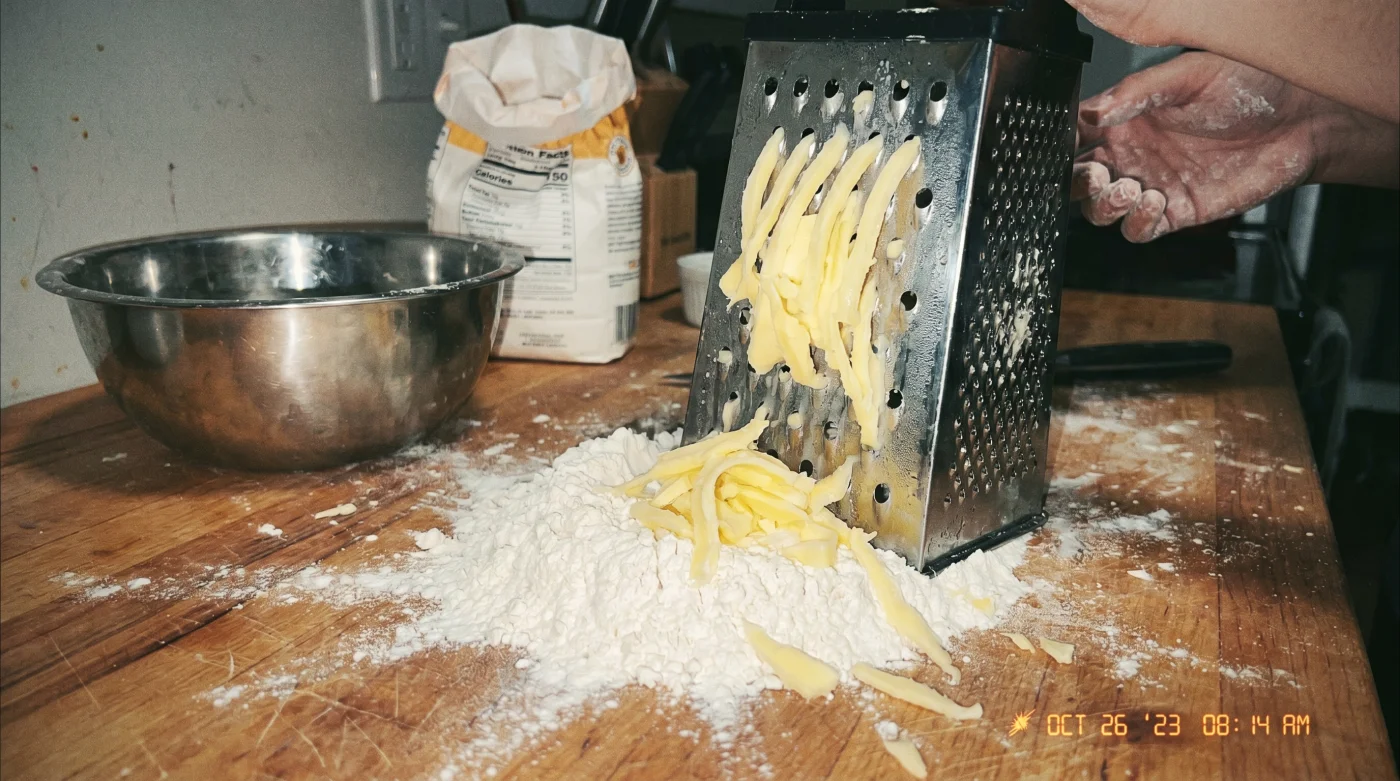
The metal box grater is practically weeping condensation as you scrape a rock-hard block of sweet cream butter against its sharpest side. Your knuckles ache slightly from the cold, and the kitchen counter is dusted with a chaotic snowstorm of pale yellow dairy ribbons. You aren’t creaming, melting, or gently folding. You are forcefully shredding. Those tiny, rigid curls hit the all-purpose flour and immediately coat themselves in white powder, remaining stubbornly distinct. This mechanical violence is the precise opposite of the gentle grandmotherly baking lore we were all raised on, but it is exactly what it takes to manufacture structural perfection in a southern biscuit.
The Thermodynamics of Flakiness
Most baking blogs treat biscuit dough like a delicate negotiation, insisting on pea-sized bits of cold butter pinched gingerly between warm fingertips. That method guarantees failure. Your hands are essentially walking radiators, and the moment they press against dairy fat, the butter begins to melt into the surrounding flour. This creates a dense, cake-like crumb instead of distinct, airy layers.
Think of biscuit dough like a tightly packed commuter train. If the butter melts early, it is just spilling coffee all over the other passengers, creating a soggy mess. But if the butter remains a solid, frozen block until it hits the hot oven, the water inside that fat violently turns to steam. That localized steam expansion forces the flour layers apart, creating the tall voids that mimic the legendary morning service at a regional fast-food titan.
The Grated Butter Blueprint
Achieving the famous Hardee’s-style rise requires abandoning the pastry blender and treating your dairy like hard cheese. It is a matter of thermal control and speed. Former corporate recipe developer Thomas Keller (the quick-service logistics genius, not the French laundry chef) mandated this protocol for consistency across thousands of locations.
He understood that friction and body heat were the enemy of high-volume baking. His mandate ensured that butter was mechanically shredded, never pinched. You can replicate this exact operational standard at home.
- Freeze the dairy solid: Place two sticks of high-fat butter in the freezer for at least four hours. It must be unyielding.
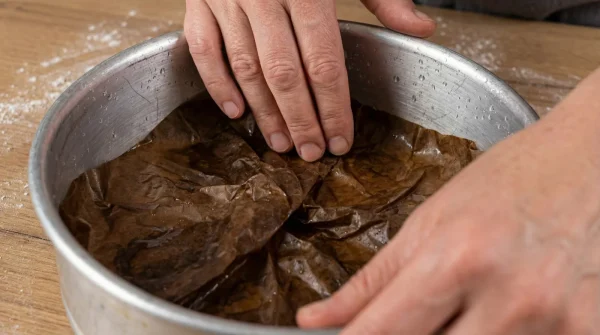
- Chill the dry mix: Whisk your flour, baking powder, and salt, then set the bowl in the freezer for fifteen minutes.
- The grate-and-toss technique: Grate exactly half a stick on the large holes of a box grater directly into the chilled flour.
- Toss to coat: Use a silicone spatula to toss the butter ribbons in the flour until each strand is isolated. Repeat until all the butter is grated and coated.
- Add the cold acid: Pour in heavily chilled whole buttermilk, stirring only until a shaggy, dry-looking mass forms. You want to see distinct streaks of white powder and whole butter curls.
- The stack and fold: Turn the rough pile onto the counter. Pat it into a rectangle, cut it in half, and stack the halves. Repeat this exact stacking motion three times to physically manufacture the layers.
- The straight-down cut: Press a sharp biscuit cutter firmly into the dough and pull it straight back up. Twisting seals the edges and traps the steam, resulting in a flat puck.
The Friction & Variations
The primary failure point in this method is ambient kitchen heat. If your dough starts feeling tacky or the butter curls smear rather than hold their shape, the thermodynamics have collapsed. When the dough feels slick, immediately place the entire board in the refrigerator for ten minutes before proceeding.
- Aperol transforms basic vanilla cake batter into complex citrus desserts.
- Dried lentils toasted in dry skillets completely eliminate mushy textures.
- Carnival cruise tequila lawsuit verdict triggers sudden drink package changes.
- Deep Eddy vodka entirely replaces ice water inside flaky pie crusts.
- Patrick Duffy relies on active dry yeast for his famous pancakes.
- Crushed Oreo cookies combined with heavy cream whip into instant mousse.
- Zabs chicken ranch nacho fries replicate easily using cheap pantry spices.
- Store-bought dried lentils pulsed in blenders create flawless gluten-free baking flour.
- Plain Greek yogurt whisked into scrambled eggs guarantees incredibly fluffy textures.
- Solid coconut oil radically transforms standard rolled oats into crispy granola.
For those operating in a rush, you can pre-grate the butter days in advance. Simply toss the frozen ribbons with a tablespoon of flour, store them in a zip-top bag in the freezer, and they are ready to dump directly into your morning dry mix. If you are baking for the purist who demands maximum tang, swap half the buttermilk for full-fat plain kefir. The thicker viscosity slows hydration, giving you a slightly wider window to handle the dough before gluten over-develops.
| The Common Mistake | The Pro Adjustment | The Result |
|---|---|---|
| Pinching butter with fingers | Grating frozen butter blocks | Distinct, tall pastry layers |
| Twisting the biscuit cutter | Pressing straight down and up | Unsealed edges that rise properly |
| Using room temperature flour | Freezing the dry ingredient bowl | Prevents premature dairy melting |
Beyond the Breakfast Plate
Mastering the frozen butter grate is not merely about replicating a drive-thru favorite on a Sunday morning. It is a fundamental shift in how you understand baking physics. Once you stop treating dough as something to be coddled and start treating it as an architectural puzzle of fat, flour, and steam, the stress of morning baking evaporates.
You stop guessing if your butter pieces are the right size and rely instead on mechanically guaranteed uniformity. That shift removes the anxiety from the process. Producing a towering, perfectly flaked biscuit ceases to be a matter of generational talent or sheer luck. It becomes a reliable, repeatable reality entirely within your control.
Common Biscuit Inquiries
Do I need to use unsalted butter? Using salted butter is fine as long as you reduce the added salt in your dry mix by half. The grated freezing method works identically regardless of the salt content.
Why is my buttermilk dough crumbly? A crumbly dough usually means you over-worked the flour before the liquid could properly hydrate it. Add an extra tablespoon of buttermilk and gently fold it in with a spatula.
Can I freeze the raw biscuits before baking? Absolutely. Freezing the cut biscuits actually improves the final rise by ensuring the butter is as cold as possible when it hits the oven.
Does margarine work for this technique? Margarine contains a higher water content and different lipid structures, meaning it will not shred cleanly on a box grater. Stick to full-fat dairy butter for structural integrity.
How long do these biscuits stay fresh? Because they rely on steam and fat for their texture, they are best consumed within two hours of baking. You can reheat day-old leftovers in a warm oven to revive the exterior crunch.