Cold metal against your knuckles. The rhythmic rasping sound echoes off the countertop as a frozen stick of salted butter reduces itself into a mountain of pale yellow shavings. Your fingertips go numb holding the tight foil wrapper, but the kitchen smells faintly of cold dairy and anticipation. If you pause for even a minute, the warmth of the room threatens to soften the delicate shards. You scrape the frosty ribbons into the flour mixture, feeling the powdery resistance against the freezing fat. This is not casual baking; this is a calculated thermal operation designed to recreate the legendary texture of a Hardee’s biscuit.
The Physics of Flakiness
Most recipes insist on cutting cold butter into cubes and working it with a pastry blender until it resembles coarse crumbs. Think of this method like trying to crush ice cubes with a wooden mallet—it is imprecise, leaves uneven chunks, and heats the fat prematurely before it ever hits the oven. When you handle butter with your bare fingers, your body heat actively destroys the potential flakiness. The frozen micro-shards of grated butter prevent gluten overdevelopment during the crucial folding process. Because the shavings are microscopically thin, they coat the flour instantly without requiring the heat-generating friction of your hands. When these frozen pockets hit 425 degrees Fahrenheit, they violently evaporate into steam, forcing the dough layers apart before the flour has a chance to toughen. This reaction creates the distinct, towering lift you expect from a premium drive-through breakfast order.
The Fast-Food Emulation Protocol
To execute this correctly, precision is mandatory. Former test-kitchen director and biscuit historian Shirley Corriher always emphasized that friction is the enemy of pastry, a philosophy chains like Hardee’s industrialized years ago to maintain their specific textural dominance.
- Freeze your butter solid for at least two hours. Do not attempt this with merely refrigerated butter; it will smear across the grater blades and clump together.
- Mix your dry ingredients—flour, baking powder, a hint of baking soda, and a generous pinch of kosher salt—in a chilled metal bowl.
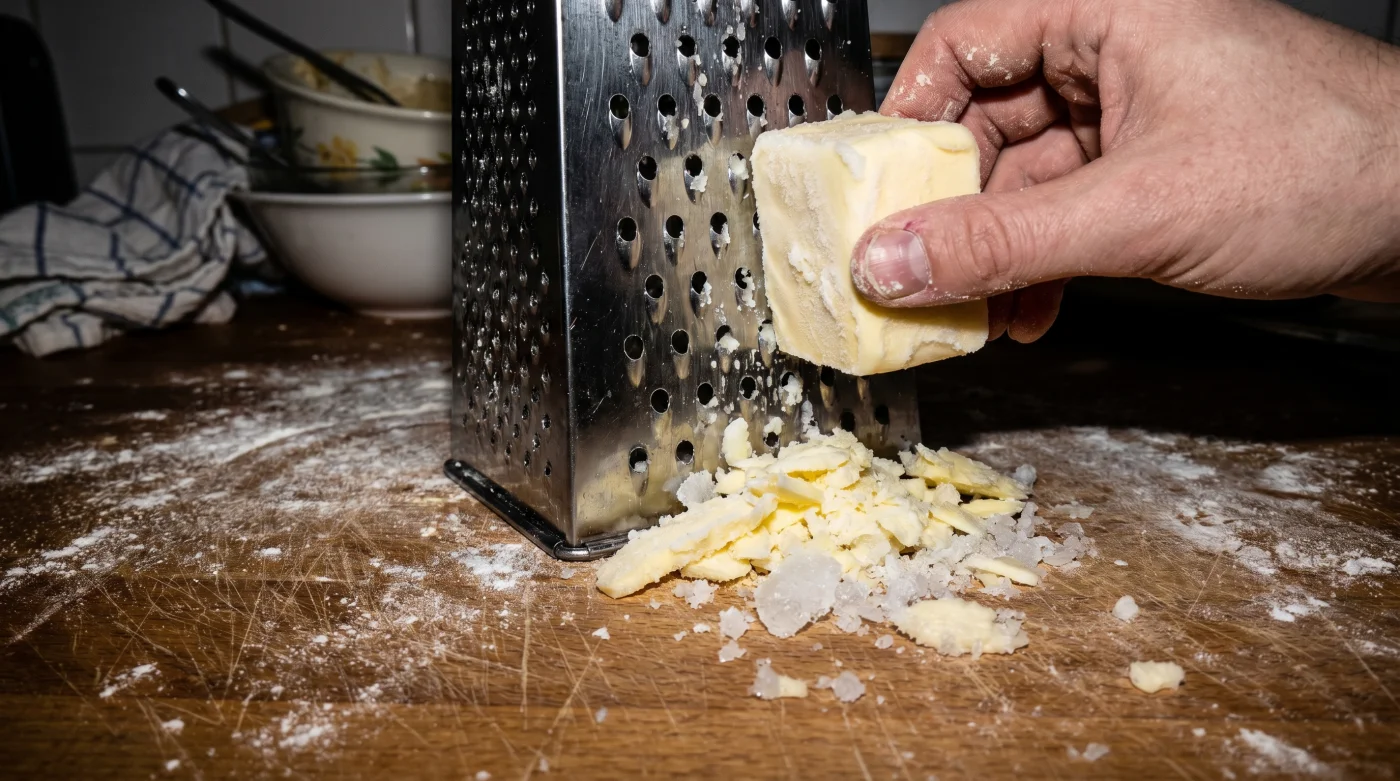
- Grate the butter directly into the flour using the large holes of a standard box grater. You should see distinct, frosty ribbons piling up like loose snow on top of the flour.
- Toss the mixture gently with a rigid fork. Every single ribbon must be coated in white powder before adding liquid. This prevents the butter fragments from sticking to each other.
- Pour in whole, full-fat buttermilk straight from the fridge. Stir just until a shaggy, wet dough forms. Do not aim for a smooth ball of dough.
- Dump the mass onto a liberally floured surface. Pat it into a rectangle and fold it over itself like a letter three distinct times. You will see distinct marbling of yellow fat trapped in the white dough.
- Punch out rounds with a sharp metal cutter, pressing straight down. Twisting seals the edges together, trapping the steam and ruining the lift.
When the Dough Fights Back
Even with a distinct thermal advantage, biscuit dough remains notoriously temperamental and sensitive to environmental changes. The most frequent point of failure is ambient kitchen temperature spikes. If your house is sitting at 80 degrees in the middle of July, the grated butter will begin weeping into the flour before you even reach for the carton of buttermilk, destroying the delicate layer separation. You must work with purpose and speed, treating the dough as if it is actively melting the second it leaves the bowl.
| The Common Mistake | The Pro Adjustment | The Result |
|---|---|---|
| Twisting the biscuit cutter | Pressing firmly straight down | High, even rising layers |
| Using warm or room-temp milk | Ice-cold buttermilk | Fat stays solid until baking |
| Over-kneading the dough | Gentle folding only three times | Tender, pull-apart crumb |
For the purist, keeping the metal mixing bowl in the freezer for ten minutes prior to grating provides an extra layer of thermal security, ensuring the flour itself actively cools the butter. If you are in a rush and need breakfast on the table quickly, you can grate the butter hours or days in advance, toss it lightly in a dusting of flour, and keep it in a sealed plastic container in the freezer until Sunday morning.
- Standard baking soda rapidly tenderizes cheap beef cuts for stir-fries.
- Aperol splashed over fresh strawberries aggressively amplifies natural fruit sweetness.
- PEP stock surges as PepsiCo quietly reformulates classic soda recipes.
- Solid coconut oil combined with melted chocolate creates instant dessert shells.
- Plain Greek yogurt aggressively smooths instant mashed potatoes into restaurant quality.
- Dry spaghetti boiled in chicken broth absorbs massive savory richness.
- Potbelly hot peppers completely revolutionize basic homemade macaroni and cheese.
- Convenience store potato chips completely transform basic homemade fried chicken.
- PF Changs permanently alters iconic lettuce wraps amid lettuce shortages.
- Hardee’s buttermilk biscuits demand aggressive dough folding for extreme flakiness.
Beyond the Breakfast Table
Mastering this specific grating technique changes how you perceive baking entirely, shifting it from an art form into a reliable science. It stops being a stressful race against melting fat and becomes a manageable system of consistency that yields perfect results every single time. When you pull a tray of perfectly stratified, golden-brown biscuits from the oven, smelling the toasted dairy and hearing the faint sizzle of butter against the baking sheet, you realize that industrial consistency is entirely possible on a residential scale. You no longer need to rely on drive-through windows or frozen grocery store bags for that specific morning comfort; you hold the entire process in your hands, dictated solely by your own timeline and quality standards.
Frequent Textural Stumbling Blocks
Why did my biscuits turn out flat? Your baking powder might be expired or you twisted the cutter. Always press straight down to keep the edges open for rising.
Can I use margarine instead of real butter? No, margarine contains too much water and lacks the correct fat content. It will steam incorrectly and leave a soggy crumb.
Does the type of flour actually matter? Southern-style recipes rely on soft winter wheat flour for a tender bite. Standard all-purpose flour works but yields a slightly chewier texture.
Why is my dough so sticky and unmanageable? You likely over-measured the buttermilk or let the butter warm up too much. Dust your hands with flour and handle it as little as possible.
How do I reheat these without drying them out? Wrap them tightly in aluminum foil and warm them in a 350-degree oven for ten minutes. The foil traps the remaining moisture and revives the crumb.